Note
Access to this page requires authorization. You can try signing in or changing directories.
Access to this page requires authorization. You can try changing directories.
Model Context Protocol (MCP) is an open standard that enables AI models to interact with external tools and services through a unified interface. In Visual Studio, MCP support enhances GitHub Copilot's agent mode by allowing you to connect any MCP-compatible server to your agentic coding workflow. This article guides you through setting up MCP servers and using tools with agent mode in Visual Studio.
Prerequisites
- Visual Studio 2022 version 17.14 or later.
- Set Enable agent mode in the chat pane in Tools > Options > GitHub > Copilot > Copilot Chat.
- Sign in to Visual Studio using a GitHub account with Copilot access.
- You can use GitHub Copilot for Free. Sign up and leverage AI to code faster and more efficiently.
How do MCP and Visual Studio extend GitHub Copilot's agent?
- MCP clients, such as Visual Studio connect to MCP servers and request actions on behalf of the AI model
- MCP servers provide one or more tools that expose specific functionalities through a well-defined interface.
- The Model Context Protocol (MCP) defines the message format for communication between clients and servers, including tool discovery, invocation, and response handling
For example, a file system MCP server might provide tools for reading, writing, or searching files and directories. GitHub's official MCP server offers tools to list repositories, create pull requests, or manage issues. MCP servers can run locally on your machine or be hosted remotely, and Visual Studio supports both configurations.
By standardizing this interaction, MCP eliminates the need for custom integrations between each AI model and each tool. This allows you to extend your AI assistant's capabilities by simply adding new MCP servers to your workspace. Learn more about the Model Context Protocol specification.
Configuration example with GitHub MCP server
- Create a new file:
<SOLUTIONDIR>\.mcp.json. Using Visual Studio to edit this file is recommended so its JSON schema is automatically applied. - Paste the following contents into the
.mcp.jsonfile
{
  "inputs": [
    {
      "id": "github_pat",
      "description": "GitHub personal access token",
      "type": "promptString",
      "password": true
    }
  ],
  "servers": {
    "github": {
      "type": "stdio",
      "command": "docker",
      "args": [
        "run",
        "-i",
        "--rm",
        "-e",
        "GITHUB_PERSONAL_ACCESS_TOKEN",
        "ghcr.io/github/github-mcp-server"
      ],
      "env": {
        "GITHUB_PERSONAL_ACCESS_TOKEN": "${input:github_pat}"
      }
    }
  }
}
Get a Personal Access Token for your GitHub Account
In Visual Studio, click the
Askdropdown in the GitHub Copilot Chat window, and then selectAgent.When prompted, paste your personal access token into the dialog.
Select the tools you'd like to use, for example,
list_issuesTry a sample prompt:
list issues assigned to me on GitHubCopilot asks for permission to use a tool made available to it by the MCP server, select Allow with the scope you wish to proceed with.
Supported MCP capabilities
Visual Studio supports local standard input/output (stdio), server-sent events (sse), and streamable HTTP (http) for MCP server transport. Currently of the three primitives (tools, prompts, resources), servers can only provide tools to Copilot's agent mode. The list and descriptions of tools can be updated dynamically using list changed events. Visual Studio provides servers with the current solution folders using roots (spec).
Finding MCP servers
MCP's official server repository is a great starting point for reference, official, and community-contributed servers that showcase MCP's versatility. You can explore servers for various functionalities, such as file system operations, database interactions, and web services.
MCP is still a relatively new standard, and the ecosystem is rapidly evolving. As more developers adopt MCP, you can expect to see an increasing number of servers and tools available for integration with your projects.
Adding an MCP server
Create a file to manage configuration of MCP servers
If you do not already have an mcp.json file, you can create it in various locations depending on the repos, users, and IDEs you would like the servers to be available/used for.
File locations for automatic discovery of MCP configuration
Visual Studio also checks for MCP configurations set up by other development environments. MCP server configurations are read from the following directories, in the following order:
%USERPROFILE%\.mcp.json
Serves as a global MCP server configuration for a specific user. Adding an MCP server here would make it load for all Visual Studio solutions.<SOLUTIONDIR>\.vs\mcp.json
Specific to Visual Studio and only loads the specified MCP servers for a specific user, for the specified solution.<SOLUTIONDIR>\.mcp.json
Works well if you're looking for an MCP configuration that you can track in source control for a repo.<SOLUTIONDIR>\.vscode\mcp.json
Scoped to the repository/solution and typically not source controlled.<SOLUTIONDIR>\.cursor\mcp.json
Scoped to the repository/solution and typically not source controlled.
Some of these locations require .mcp.json while others require mcp.json.
MCP configuration format
You may define both remote (URL and credentials) and local (command-line invocation) servers.
It’s common to invoke tools via package managers. For example, npx -y @azure/mcp@latest or docker run ... mcp/github. Visual Studio respects whatever command you specify, allowing you to pin versions or pass flags as needed.
Format must follow the MCP specification, for example, an array of server objects, each with name, command or url, transport, etc.
Editing MCP configuration
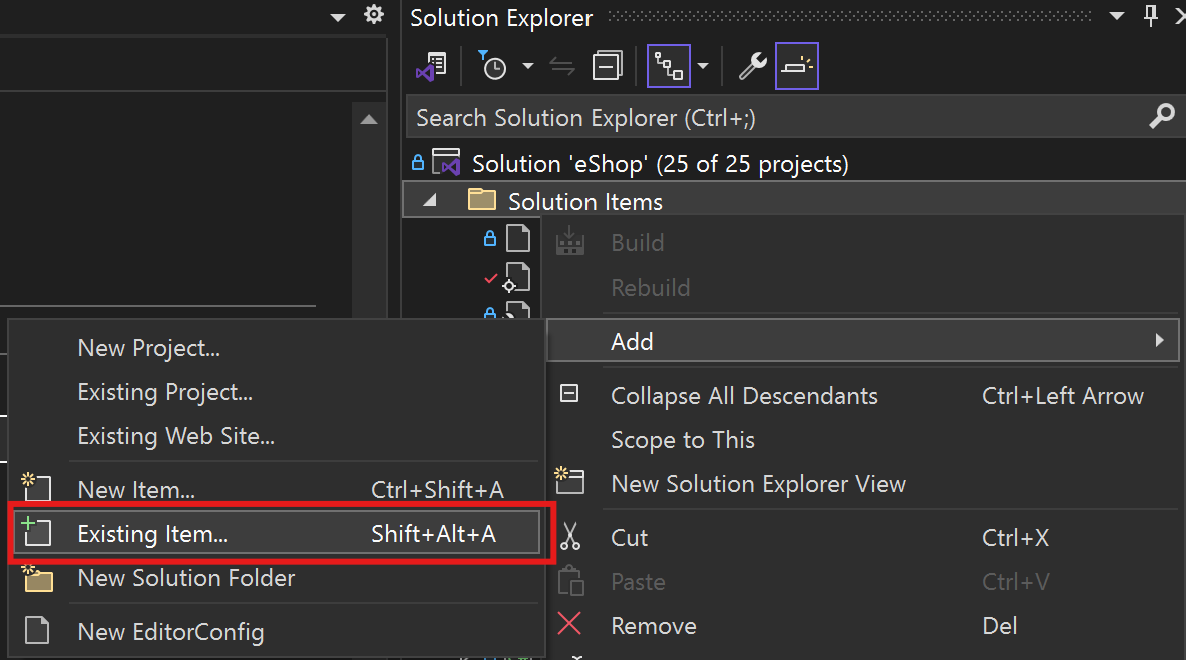
With an existing mcp.json file, add the file location to Solution Items in Solution Explorer, if you're checking the file into your version control system.
When the file is saved with valid syntax, GitHub Copilot's agent restarts and reloads the configured servers.
Tool Lifecycle
As soon as a server is discovered or added:
- Visual Studio initializes the server (performs a handshake and queries the tool list).
- Visual Studio subscribes to the MCP event
notifications/tools/list_changed. - When that event fires, Visual Studio resets any prior acceptances or permissions on tools (to prevent rug-pull attacks), re-fetches the tool list, and updates the count/UI live.
- When the server is successfully enabled, tools are made available to the Agent. The tools are disabled by default and must be manually enabled.
- If a server is removed, Visual Studio immediately kills its process and withdraws all its tools from the UI.
- If you edit a server definition, Visual Studio terminates and relaunches it, and then re-queries.
Manage tool approvals
When a tool is invoked, Copilot requests confirmation to run the tool. This is because tools might run locally on your machine and perform actions that modify files or data.
In the chat pane, after a tool invocation, use the Allow dropdown options to automatically confirm the specific tool for the current session, solution, or all future invocations.
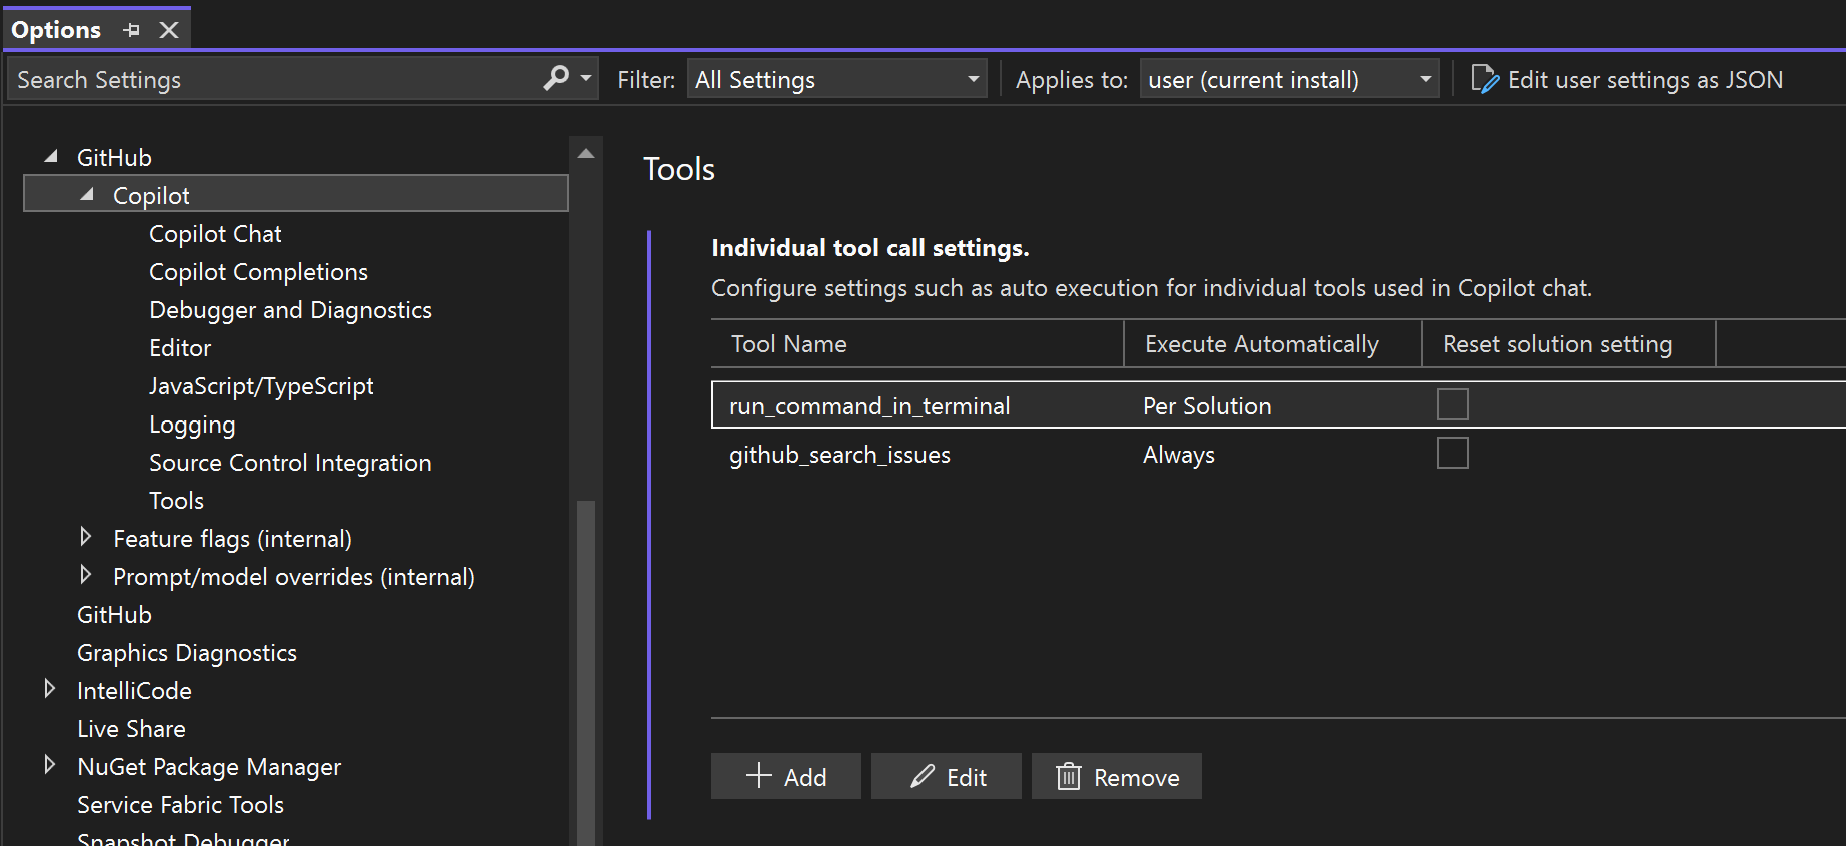
You can reset tool confirmation selections in Tools > Options > GitHub > Copilot > Tools.
Frequently asked questions
As an administrator, how do I control use of MCP servers in agent mode for Visual Studio users?
Agent mode and MCP usage in Visual Studio are governed by the Editor preview features flag in the GitHub Copilot dashboard for administrators. If the administrator turns off this setting, users under that subscription won’t be able to use agent mode or connect to MCP servers in Visual Studio.
For more information, see managing policies and features for copilot in your enterprise.


