Note
Access to this page requires authorization. You can try signing in or changing directories.
Access to this page requires authorization. You can try changing directories.
Microsoft 365 Copilot connectors(formerly Microsoft Graph connectors) enable you to ingest your line-of-business data into Microsoft Graph to make it available to Microsoft 365 Copilot. When your data is ingested, Copilot can reason over the data and use it to respond to user prompts.
The Microsoft 365 Agents Toolkit (an evolution of Teams Toolkit) includes a template that you can use to build Copilot connectors. The Copilot connector template is designed to help you build connectors quickly by using the Copilot connector API in Microsoft Graph. The template scaffolds a connector that pulls data from the GitHub API into Microsoft Graph. After you build your connector, you can run it locally via the F5 experience or deploy it via Azure Functions.
This article provides a walkthrough of the steps to build your first Copilot connector by using the Microsoft 365 Agents Toolkit in Visual Studio Code.
Prerequisites
The following prerequisites are required to complete the steps in this article:
Node.js, supported versions: 18, 20, 22
A Microsoft 365 Copilot license or a Microsoft 365 Developer tenant with uploading custom apps enabled.
Note
To test your connector in Microsoft 365 Copilot Chat, you need a Microsoft 365 Copilot license.
You must have the ability to admin consent in Microsoft Entra admin center. You must be or complete this step as a Global administrator. See Grant tenant-wide admin consent to an application for the required roles.
Your user must have the role Search Administrator, Cloud Application Developer to see the connector in the Microsoft 365 admin center.
Build your first custom connector
Use the following steps to build your first connector.
In the sidebar in Visual Studio Code, choose the Microsoft 365 Agents Toolkit > Create a New Agent/App.

Select Copilot connector.

Enter
Github Issuesas the connector name.Create a tenant-wide unique ID for the connector. For details about the requirements for the connector ID, see the id property of the externalConnection resource.
Select Default folder to store your project root folder in the default location.
Configure the repository you want to pull issues from by using the
CONNECTOR_REPOSfield from in the.env.localfile.
Press F5 to run the connector locally. The toolkit creates a Microsoft Entra app for your connector and starts the provisioning process.
Follow the link in the terminal to the Microsoft Entra admin center and select Grant admin consent.
Note
To complete this step, you must be a Global Admin in your organization.

The app creates the connection, registers the schema, and then does a full crawl to ingest items.
Note
Registering the schema might take up to 10 mins.
After the full crawl completes, in the Microsoft 365 admin center:
In the left pane, go to Settings > Search & Intelligence > Data sources.
Find your Connection ID.
Choose Include connector results.

Note
To complete this step, you must be a Search Admin. This step enables results from the connector to be used by Microsoft 365 Copilot Chat. If you are only going to use this connector as a knowledge source for a declarative agent, this step isn't necessary.
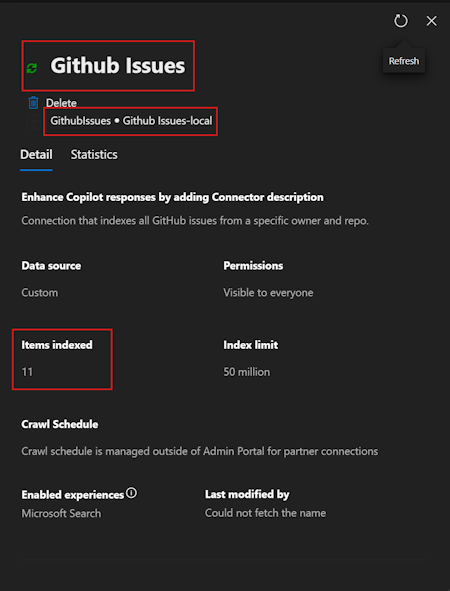
To verify that the items were indexed, choose the relevant connector name. Check the Items indexed field to see how many issues were indexed.
Open Microsoft 365 Copilot Chat and test a sample prompt such as "What are the two latest GitHub Issues?". Notice the external item citations at the bottom of the page. These citations are the data from your Copilot connector.

Customize the template for your data source
To customize this template for your custom data, you can update the content of the following folders:
src/custom: Contains custom code to gather and transform data to be ingested into Microsoft Graph. Although the example uses the GitHub issues API, you can replace it with any other API.src/references: Includes the schema definition of the connector. Adjust it to match the data and metadata you want to ingest.src/models: Contains the model definition for an internal representation of the data and configuration. Both models can be customized to fit your needs.
In addition to these folders, you can customize other parts of the code, depending on the scenario. You can search the code for comments starting with the [Customization point] string. These comments indicate areas for potential customization.